402 Payment Required response to any request that does not include a valid payment header, and only triggers your workflow once payment is verified and confirmed on-chain.
This node uses Faremeter under the hood for payment handling and the Corbits facilitator for on-chain confirmation.
The x402 Paywall mode works with EVM wallets only (e.g., Base). Crossmint wallets are on Solana, so for this trigger you need an external EVM wallet such as MetaMask or any wallet that exposes a private key on an EVM chain.
Trigger Fields
When you add a Crossmint Checkout Trigger node and select the Paywall mode, the following fields are available: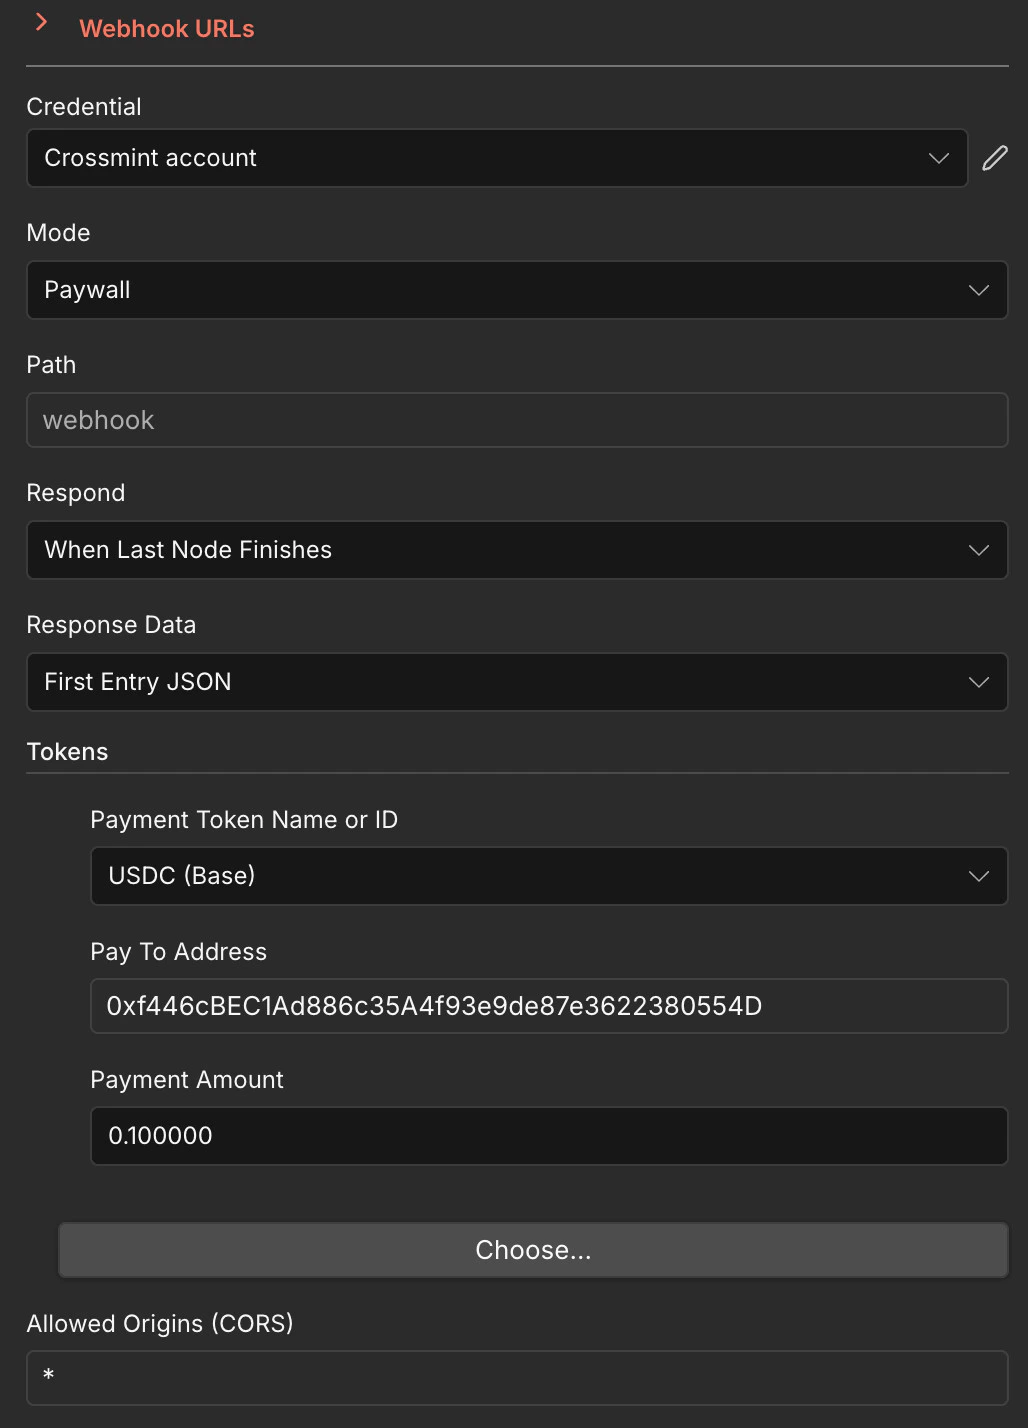
Credential
- Crossmint account — Your Crossmint API credential. See the Quickstart for how to set this up.
Mode
- Paywall — Enables x402 payment verification. Every incoming request must include a valid
X-PAYMENTheader or the node responds with402 Payment Required.
Path
- Path — The webhook path appended to your n8n instance URL. For example, setting this to
webhookproduces a URL likehttps://your-instance.app.n8n.cloud/webhook/webhook.
Respond
- Respond — Controls when the webhook sends its HTTP response back to the caller:
When Last Node Finishes— Waits until the entire workflow completes before respondingImmediately— Responds right away, before the workflow finishesUsing 'Respond to Webhook' Node— Lets you control the response manually with a dedicated node
Response Data
- Response Data — Determines what data is returned in the webhook response:
First Entry JSON— Returns the JSON output of the first item produced by the workflowAll Entries JSON— Returns all items as a JSON arrayNo Response Body— Returns an empty body
Tokens
The Tokens section defines which cryptocurrency payments the paywall accepts. You can configure one or more token entries:- Payment Token Name or ID — The token to accept for payment. Select from available options such as
USDC (Base),USDC (Base Sepolia), etc. - Pay To Address — The EVM wallet address that receives the payment (e.g.,
0xf446cBEC1Ad886c35A4f93e9de87e3622380554D) - Payment Amount — The amount of the token required per request (e.g.,
0.100000for 0.1 USDC)
Allowed Origins (CORS)
- Allowed Origins (CORS) — Controls which origins can call the webhook. Set to
*to allow all origins, or specify a comma-separated list of allowed domains (e.g.,https://myapp.com, https://another.com).
How It Works
1
Client sends a request
A client sends an HTTP request to your webhook URL. If no
X-PAYMENT header is present, the node responds with 402 Payment Required along with the payment requirements (token, amount, recipient).2
Client signs a payment
The client uses an x402-compatible library (like Faremeter) to generate a signed payment proof and retries the request with the
X-PAYMENT header.3
Payment is verified and confirmed
The node verifies the payment proof via the Corbits facilitator and confirms the transaction on-chain. Once confirmed, your workflow executes.
4
Workflow responds
The workflow runs and returns its output to the caller, depending on your Respond and Response Data settings.
Testing with a Client Script
Below is a complete client-side script that sends an x402 payment to your Paywall webhook. It uses Faremeter’s@faremeter/fetch, @faremeter/payment-evm, and @faremeter/wallet-evm packages.
Private Key SecurityReplace the placeholder private key below with your own EVM wallet private key. Never use real private keys in code — always store them in environment variables or secure vaults.
- Install the required packages:
- Save the script as
x402-client.mjsand set your environment variables:
-
Update the
URLconstant in the script to point to your own Paywall webhook URL. - Run it:
Example Use Cases
- Paid API Endpoints — Monetize any n8n workflow by gating it behind a micropayment
- AI Agent Services — Let AI agents pay per-request for access to data or actions
- Premium Webhooks — Offer paid webhook integrations to third-party developers
- Content Paywalls — Gate access to generated content, reports, or data feeds
Next Steps
Wallets Node
Learn about managing wallets for payments
Checkout Node
Automate purchases from Amazon and Shopify
Faremeter Docs
Full x402 protocol and Faremeter documentation
Ask ChatGPT
Ask Crossmint Expert GPT for n8n guidance