Introduction

In this quickstart, you will create new user wallets on Story and use passkeys for sending transactions using this wallet. By the end of this guide, you’ll be able to:

  • Create client-side wallets on Story Protocol
  • Configure multiple authentication methods
  • Mint your first NFT using the wallet

Preparation Steps

1

Create a developer account

To get started, create a developer account in the Crossmint Staging Console. Open that link, sign in, and accept the dialog to continue.

Crossmint offers two consoles: staging, for development and testing, and www, for production.

Then, navigate to project Settings > General, and set the wallet type to “Smart Wallets”.

2

Get an API Key

Create a client-side API key with these scopes: wallets.create, wallets.read, wallets:balance.read, wallets:transactions.create, wallets:transactions.read, users.read, users.create.

Check the “JWT Auth” box.

This allows your API key to create new client wallets.

Create Client Wallets

1

Setup Application

Follow the Client Wallets Quickstart guide to use Crossmint’s Wallets SDK in your application.

2

Configure Story's Chain

Set story-testnet as the defaultChain property.

"use client";

import { CrossmintProvider, CrossmintAuthProvider } from "@crossmint/client-sdk-react-ui";

const clientApiKey = process.env.NEXT_PUBLIC_CROSSMINT_CLIENT_KEY as string;

export default function Providers({ children }: { children: React.ReactNode }) {
    return (
        <CrossmintProvider apiKey={clientApiKey}>
            <CrossmintAuthProvider
                embeddedWallets={{
                    type: "evm-smart-wallet",
                    defaultChain: "story-testnet",
                    createOnLogin: "all-users",
                }},
                loginMethods={["google", "twitter", "farcaster", "email"]}
            >
                {children}
            </CrossmintAuthProvider>
        </CrossmintProvider>
    );
}
3

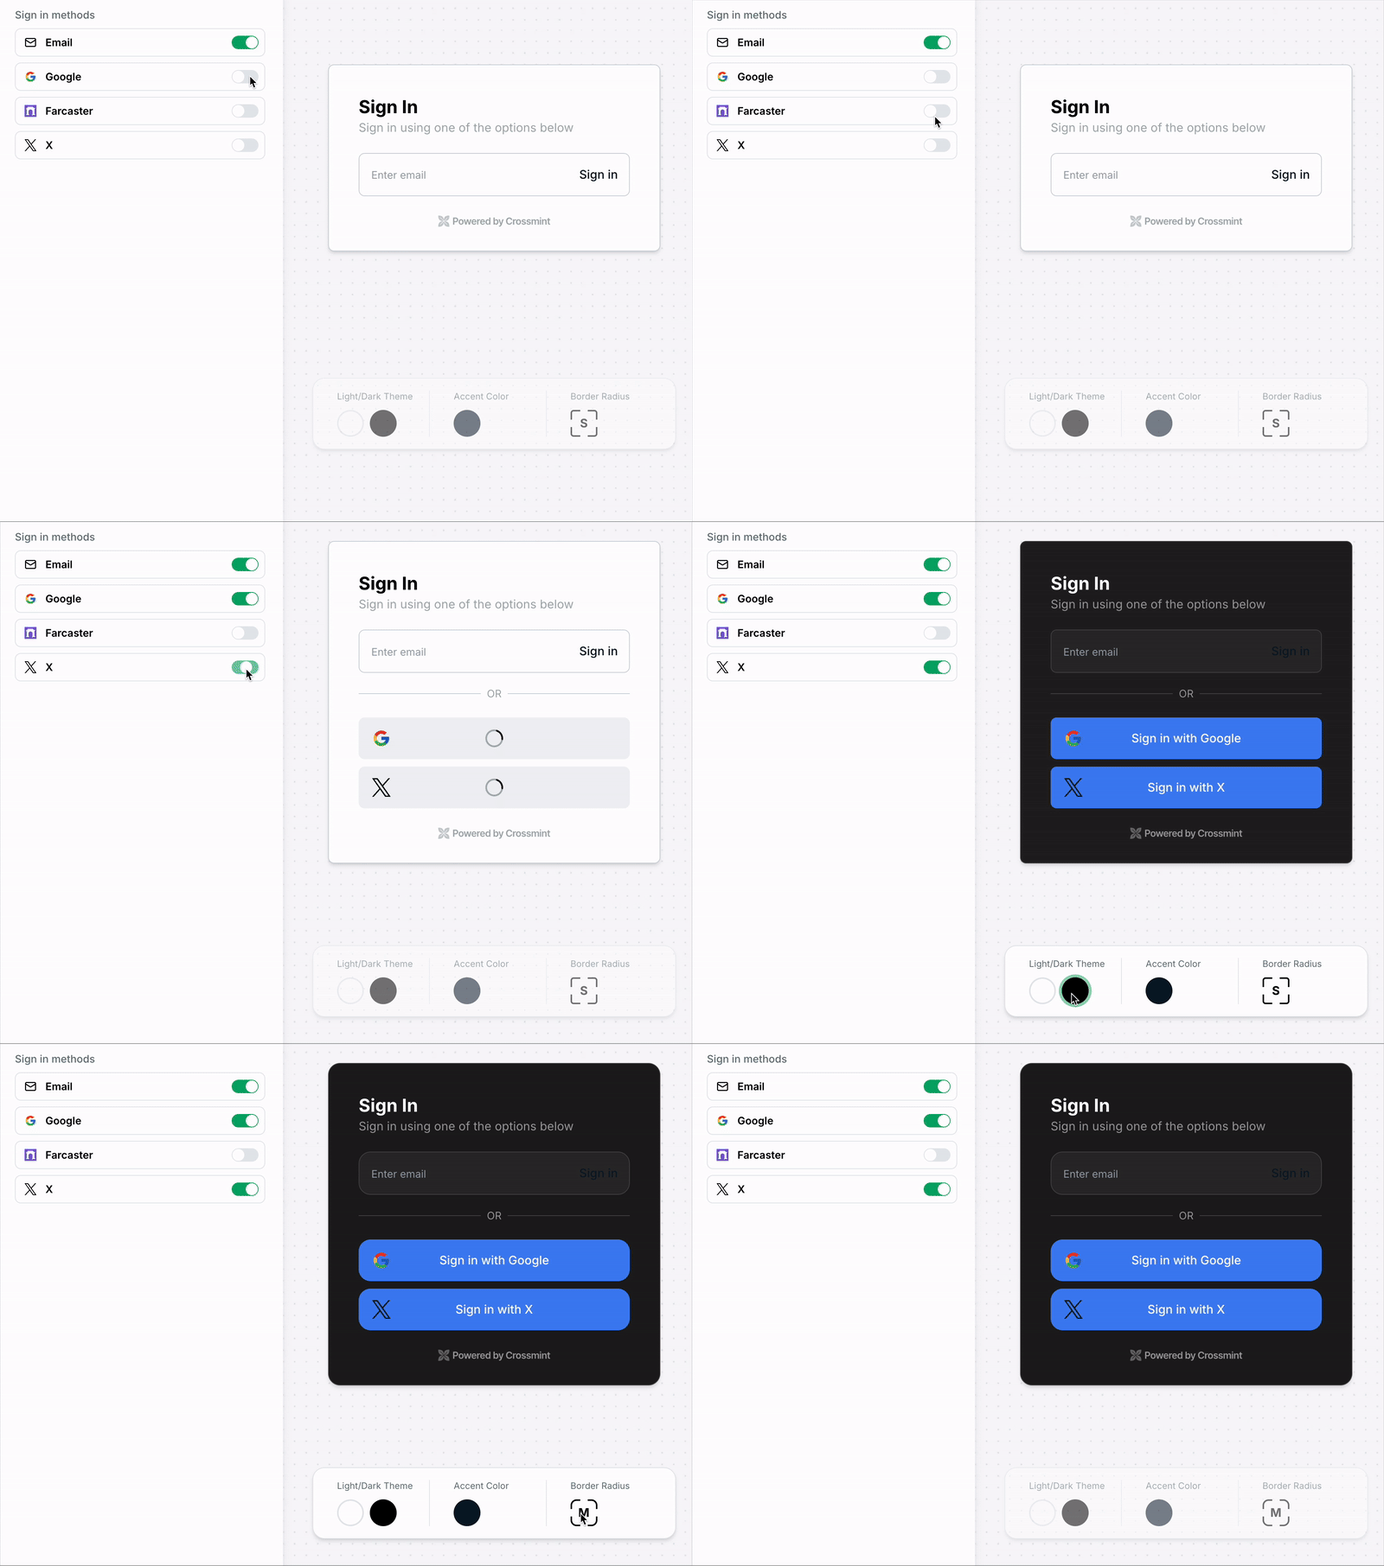
Format Login Component

Adjust the login component’s style to match your application’s design. You can experiment with it here.
Send Arbitrary Transaction

1

Specify the NFT Contract

Define the address and interface (ABI) of the NFT smart contract on Story Protocol.

export const NFT_CONTRACT_ADDRESS = "0x937bef10ba6fb941ed84b8d249abc76031429a9a" as const;
export const NFT_CONTRACT_ABI = [
    {
        inputs: [
            {
                internalType: "address",
                name: "recipient",
                type: "address",
            },
            {
                internalType: "string",
                name: "tokenURI",
                type: "string",
            },
        ],
        name: "mintNFT",
        outputs: [
            {
                internalType: "uint256",
                name: "",
                type: "uint256",
            },
        ],
        stateMutability: "nonpayable",
        type: "function",
    },
];
2

Create a React Component for the Transaction

Create a user-friendly interface that:

  • Displays the transaction status
  • Allows users to send an arbitrary transaction to the NFT contract
  • Displays the transaction hash and a link to the Story Explorer
import { EVMSmartWallet } from "@crossmint/client-sdk-react-ui";
import React from "react";
import { NFT_CONTRACT_ADDRESS, NFT_CONTRACT_ABI } from "./utils";
export default function SendTransactionComponent({ wallet, }: { wallet: EVMSmartWallet | undefined }) {
    const [txStatus, setTxStatus] = React.useState<'idle' | 'pending' | 'success' | 'error'>('idle');
    const [txError, setTxError] = React.useState<string | null>(null);
    const [tx, setTx] = React.useState<string | null>(null);

    if (wallet) {
        return (
            <div className="max-w-md mx-auto bg-white rounded-xl  overflow-hidden p-6 space-y-4 ">

                <button
                    onClick={async () => {
                        try {
                            setTxStatus('pending');
                            setTxError(null);
                            const tx = await wallet.executeContract({
                                address: NFT_CONTRACT_ADDRESS,
                                abi: NFT_CONTRACT_ABI,
                                functionName: "mintNFT",
                                args: [wallet.address, "test-uri"],
                            });
                            setTx(tx);
                            setTxStatus('success');
                        } catch (error) {
                            setTxStatus('error');
                            setTxError(error instanceof Error ? error.message : 'Transaction failed');
                            setTx(null);
                        }
                    }}
                    disabled={txStatus === 'pending'}
                    className="w-full flex items-center justify-center space-x-2 bg-blue-600 hover:bg-blue-700 text-white px-4 py-2 rounded-lg transition-colors"
                >
                    {txStatus === 'pending' ? (
                        <>
                            <svg className="animate-spin -ml-1 mr-3 h-5 w-5 text-white" xmlns="http://www.w3.org/2000/svg" fill="none" viewBox="0 0 24 24">
                                <circle className="opacity-25" cx="12" cy="12" r="10" stroke="currentColor" strokeWidth="4"></circle>
                                <path className="opacity-75" fill="currentColor" d="M4 12a8 8 0 018-8V0C5.373 0 0 5.373 0 12h4zm2 5.291A7.962 7.962 0 014 12H0c0 3.042 1.135 5.824 3 7.938l3-2.647z"></path>
                            </svg>
                            <span>Processing...</span>
                        </>
                    ) : (
                        'Send Transaction'
                    )}
                </button>

                <div className="mt-4">
                    {txStatus === 'pending' && (
                        <div className="flex items-center space-x-2 text-amber-500">
                            <svg className="animate-spin h-5 w-5" xmlns="http://www.w3.org/2000/svg" fill="none" viewBox="0 0 24 24">
                                <circle className="opacity-25" cx="12" cy="12" r="10" stroke="currentColor" strokeWidth="4"></circle>
                                <path className="opacity-75" fill="currentColor" d="M4 12a8 8 0 018-8V0C5.373 0 0 5.373 0 12h4zm2 5.291A7.962 7.962 0 014 12H0c0 3.042 1.135 5.824 3 7.938l3-2.647z"></path>
                            </svg>
                            <span>Transaction in progress...</span>
                        </div>
                    )}
                    {txStatus === 'success' && (
                        <div className="flex items-center space-x-2 text-emerald-600">
                            <svg className="h-5 w-5" fill="none" stroke="currentColor" viewBox="0 0 24 24">
                                <path strokeLinecap="round" strokeLinejoin="round" strokeWidth="2" d="M5 13l4 4L19 7"></path>
                            </svg>
                            <span>Transaction successful!</span>
                            {tx && (
                                <a
                                    href={`https://www.oklink.com/story-odyssey/tx/${tx}`}
                                    target="_blank"
                                    rel="noopener noreferrer"
                                    className="underline hover:text-emerald-700"
                                >
                                    View in explorer
                                </a>
                            )}
                        </div>
                    )}
                    {txStatus === 'error' && (
                        <div className="flex items-center space-x-2 text-rose-500">
                            <svg className="h-5 w-5" fill="none" stroke="currentColor" viewBox="0 0 24 24">
                                <path strokeLinecap="round" strokeLinejoin="round" strokeWidth="2" d="M6 18L18 6M6 6l12 12"></path>
                            </svg>
                            <span>Transaction failed: {txError}</span>
                        </div>
                    )}
                </div>
            </div>
        );
    }
    return null;
}
3

Add the Transaction Component to the App

Incorporate the transaction component into the main wallet interface, using the useWallet hook to manage wallet state and pass it to the transaction component.

export default function WalletComponent() {
    const { wallet, status, error } = useWallet();
    return (
        <>
            <Card className="p-4">
                <Status wallet={wallet} status={status} error={error} />
            </Card>
            <SendTransactionComponent wallet={wallet} />
        </>
    );
}